Creating a Headless eComm Site with Prismic, imgix, Nuxt, & Snipcart
It's important to be able to create a Headless commerce website that is both performant and easy to use. I have created a quick simple demo with performant responsive images from imgix that uses an extremely easy UI from Prismic.
Post created: September 30, 2020
Post last updated: April 27, 2021
I recently did a live demo at the Netlify Headless Commerce conference where I built and deployed a simple eComm site in about 10 minutes. It was such a fun demo I wanted to share the steps here. The site is using Prismic as a headless CMS, imgix for responsive images, Nuxt.js on the front end, Tailwind as a CSS framework, Snipcart for the shopping cart, and Netlify to deploy the site. If you want to sign up for these and follow along, I didn't spend one penny to deploy this.
What are we building?
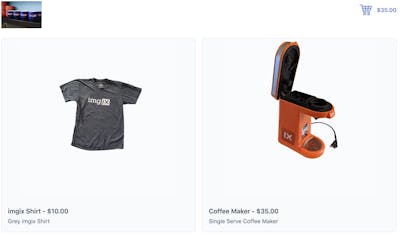
My goal for this demo was to quickly create a working eComm website using technology to support Headless Commerce. In the end we will have a simple page that has a Navbar with your company name and shopping cart link, a grid display of all the products on the home page, and an individual page for each product. Once this is setup in Nuxt, end users can add/remove/edit products easily in Prismic without having to code anything. The design is pretty bare bones, so you can easily add to this with Tailwind. Here is a preview of what this will look like:
Install Items
Run the following command to install the prismic client (you might need to add sudo):
npm install -g prismic-cli
Then you can clone this theme and initiate the prismic project:
prismic theme --theme-url https://github.com/daletom/nuxtjs-ecomm.git --conf nuxt.config.js
Create Content & Add Snipcart
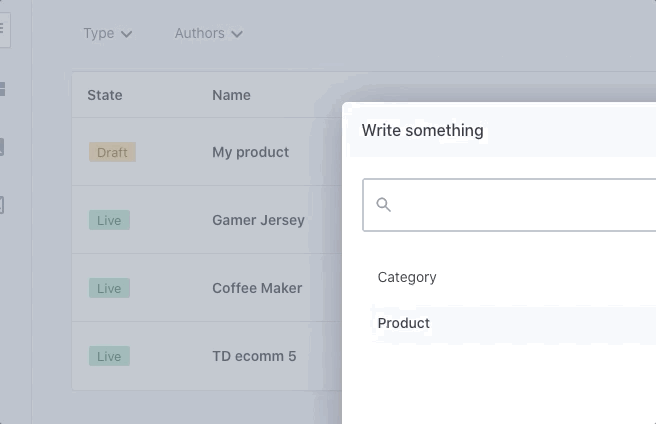
Next you will need to login to your Prismic Account. Create a layout and a few products.
Once this is complete, you will need to:
- login or create a free account at Snipcart.
- You need to copy the Public Test API Key. Simply click on your account at the top right and go to API Keys.
- Paste this API key with an editor. Now open the project folder we created when you configured the above Prismic theme. Go to your layouts folder and the default.vue file. Paste this API key with an editor. You will need to replace {your-api-key} with the snipcart API key, it will be in the hidden snipcart div that looks like this:
<div hidden id="snipcart" data-api-key="{your-api-key}"></div>
Now you can return to your terminal and cd into the project folder, then launch your nuxt front end:
cd {project-name}
npm run dev
Then you can access it at http://localhost:3000.
Having a look at what I did with images
Now that you are seeing this in your localhost, let's dig in a little more into what we built and why. If you're following me step-by-step, you may not realize but you also installed the Vue-imgix SDK when you cloned my prismic theme. This allows us to easily create responsive images in an img or picture element. For this example, I created a few components and then replaced the img tag with an ix-img tag to activate the SDK. If you are looking to add this to your existing Prismic project and are not cloning my theme, here is a simple cheatsheet for adding this to Nuxt:

I want to focus on one of the components I used for the product images, the ProductGallery.vue component. This is the ix-img tags I used:
<ix-img
    :src="imageSrc()"
    width="380"
    height="380"
    :imgixParams="{fit:'fill', fill:'solid', fillcolor:'f7fafc', auto:'format'}"
    :alt="imgobject.alt"
    loading="lazy"
    fixed
  />
I am using a v-bind for the src of each product. You will notice I am using a imageSrc() function to build out the image urls. Since the imgix Vue SDK does not support putting full urls in the ix-img tag, I needed to use this function to remove the pathname.
I wanted to display each product image at the same size, I feel this will make the gallery of products look better. This is why I added a width and height of 380. When I add a width, height, and fixed tag the imgix Vue SDK will make a srcset that is 380x380 at dpr 1, 2, 3, 4, & 5.
Since I want all the products to be the same size, 380 x 380, that could result in some cropping and removing part of the product image. I don't want that. Instead, I want to retain all of the image then fill in any extra space with a color in the background of these to match the website (I can do that since these are pngs). To achieve that with imgix, I can use the fit:'fill', fill:'solid', fillcolor:'f7fafc'.
The last item about the imgix api I want to mention is the quality settings. When you choose a fixed size that uses different DPRs, you will also notice that the quality settings lower as the dpr numbers increase. This is a great practice with images called variable quality. You can absolutely lower quality further as you increase the dpr of an image.
I do love that imgix is now serving a large number of variations of images for us now with this SDK. Now that we have everything in place, here is an example resulting image url. It is using the prismic image urls, I have my automatic formatting, my set width & height, the fit parameters we discussed, a dpr of 2 since I'm viewing on my mac laptop, a quality of 50, and an identifier for the imgix vue library:
https://images.prismic.io/tdecomm21/de0680b1-d97e-464b-bc34-0e78a03f1e7c_ix_grey_shirt.png?auto=format&w=380&h=380&fit=fill&fill=solid&fillcolor=f7fafc&dpr=2&q=50&ixlib=vue-2.8.1
Launching the project in production
Launching this in Netflify or Vercel is very easy. I'm using Netlify for this example. When you are ready to launch a production environment, here are the steps:
- Run npm run generate in your terminal. This will generate a dist folder in your project.
- Connect to Netlify. You can then either connect this project to github and deploy from Netlify or just simply drag the dist folder to NetlifyDrop. If connecting from Github, you will be essentially choosing the build command to be npm run generate and the publish directory to be dist.
Here is a Live Example. Here is also a video tutorial I did during the Netlify Headless Commerce Conference:
{% vimeo 458013155 %}
Here is the documentation for deploying Nuxt.
For Snipcart, you also need to update your storeUrl.
Learn more
- Info about responsive images from imgix
- If you would like to learn more about the imgix Vue SDK that I used, here is the link to that SDK.
- Snipcart API Key - I know it seems concerning we are adding an API key for Snipcart that could be find in the javascript, but as per Snipcart:
"This key can be shared without security issues because it only allows a specific subset of API operations."
- Need more examples from Prismic? Here is a great example on making a blog
Credit
Credit goes to many poeple and the articles they have written for helping and giving insight. Phil Snow, Lucie Haberer & Renaud Bressand from Prismic, as well as Maxime Laboissonniere at Snipcart, and many other folks.